


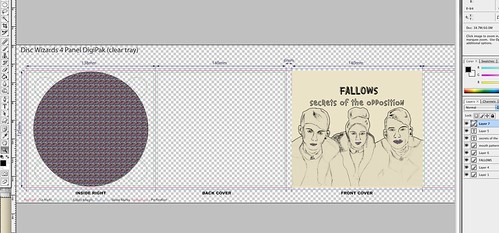
The next step I took was to transfer the main image onto a template of a four panel digipak. The first thing I done was download a digipak template off the internet and open it in photoshop. I chose to do a four panel digipak because I thought that it would be the most realistic one to use considering my time frame although I would have liked to make a booklet to go with the finished digipak contain lyrics and extra pictures. After transfering the front cover image to the template, I then created the CD section which was just the same pattern from the mouths made into a cd shape
Tomorrow is my final editing session which is available for me to complete the digipak so I have made this plan of action to follow tomorrow to make sure it all gets done:
1. Fill in the whole digipak the appropriate colour (cream).
2. Write the track listing on the back (8 songs).
3. Add in all of the record company details and barcode etc.
4. Transfer the main characters drawn image onto the left cover and make
it cover the whole page.
5. Type out the lyrics to the song in my music video on the left cover over the image of the main singer.
No comments:
Post a Comment